

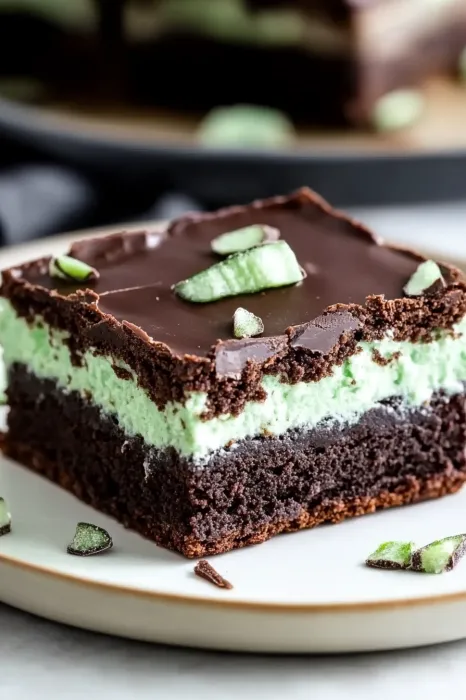
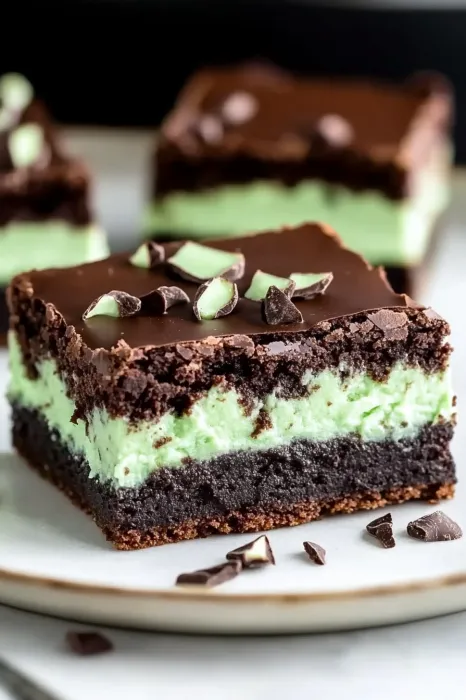
Mint chocolate brownies transform the classic fudgy treat into an extraordinary three-layer dessert that combines rich chocolate with refreshing peppermint. This indulgent creation features a chewy brownie base, a smooth mint cream center, and a glossy chocolate ganache topping that creates the perfect balance of flavors and textures.
Each bite delivers a delightful contrast between the deep cocoa notes and the bright, cool peppermint filling. Perfect for special occasions or whenever you crave something beyond ordinary brownies, this recipe creates a dessert that looks as impressive as it tastes while remaining surprisingly straightforward to prepare.
Table of Contents
Why You’ll Love This Recipe
- Creates a stunning layered dessert that looks professional with relatively simple techniques
- Provides the perfect balance between rich chocolate and refreshing mint flavors
- Offers make-ahead convenience perfect for entertaining or satisfying future cravings
I discovered the magic of mint and chocolate layers at a family gathering years ago when my mother served a similar treat. The moment I bit into that first piece, revealing the surprising mint layer between chocolate layers, I was captivated by the unexpected yet perfect flavor combination.
My friends now request these brownies for gatherings, and watching their expressions as they discover the creamy mint center brings me genuine joy. Even those who claim not to enjoy mint-chocolate combinations often convert after tasting these perfectly balanced brownies.
Essential Ingredients
- Unsalted butter (1 cup total, divided): Creates richness in the brownie base and creaminess in the mint filling
- Granulated and brown sugars (combined 1½ cups): Provide the perfect balance of sweetness and chewy texture
- Peppermint extract (1 teaspoon): Delivers authentic mint flavor without overwhelming the chocolate
- Semisweet chocolate (8 ounces for brownie, 6 ounces for ganache): Forms the foundation of deep chocolate flavor
- Heavy cream (½ cup, divided): Contributes to both the silky mint filling and glossy ganache topping
Preparation Steps
Brownie Base Preheat your oven to 350°F and line a 9×13 inch baking pan with parchment paper for easy removal.
Melt butter and chocolate together using either a double boiler or microwave in 30-second intervals, stirring between each.
Whisk in both sugars until completely incorporated and slightly cooled before adding eggs one at a time.
Texture Development Fold in dry ingredients with a gentle hand, stopping when just combined to avoid overmixing.
Pour the batter into your prepared pan, spreading evenly to reach all corners.
Bake for 25-30 minutes or until a toothpick inserted comes out with a few moist crumbs but no wet batter.
Cooling and Splitting Allow the brownie to cool completely in the pan before refrigerating for 30 minutes to firm up.
Remove the entire brownie slab from the pan using the parchment paper overhang.
With a long, sharp knife, carefully split the brownie horizontally to create two even layers.
Mint Filling Creation Beat softened butter until light and fluffy in a medium bowl, about 2-3 minutes.
Gradually add powdered sugar, then incorporate heavy cream and peppermint extract.
Add a few drops of green food coloring for that classic mint visual appeal, adjusting to your preferred shade.
Layer Assembly Place the bottom brownie layer back into the cleaned baking pan lined with fresh parchment.
Spread the mint filling evenly across the surface, reaching all the way to the edges.
Carefully position the top brownie layer over the mint filling, pressing down gently to secure.
Ganache Finishing Combine chocolate chips, heavy cream, and a small amount of butter in a microwave-safe bowl.
Heat in 20-second intervals, stirring between each, until completely melted and glossy.
Pour the ganache over the top layer, using an offset spatula to create a smooth, even surface.
You Must Know
- Chilling the brownie before cutting it horizontally prevents crumbling and ensures clean layers
- The peppermint extract strength varies by brand, so start with less and adjust to taste
- These brownies taste even better after 24 hours when the flavors have had time to meld
I particularly treasure how this recipe connects to childhood memories while creating new ones. My grandmother always said the best desserts tell a story, and these layered brownies certainly do.
When I first attempted this recipe as a teenager, I made the classic mistake of trying to assemble the layers while everything was still warm. The resulting mess taught me the value of patience in baking. Now when I make these with my niece, I emphasize the importance of proper cooling time, passing along not just the recipe but the wisdom that comes from experience. The pride in her eyes when she serves perfectly layered brownies makes the extra steps worthwhile.
Serving Suggestions
These versatile brownies can be presented in multiple ways to suit different occasions.
Cut into small squares for elegant dessert platters at parties or holiday gatherings.
Serve slightly chilled with a scoop of vanilla ice cream for a more substantial dessert experience.
Pair with hot coffee or tea for an afternoon treat that balances the sweetness with bitter notes.
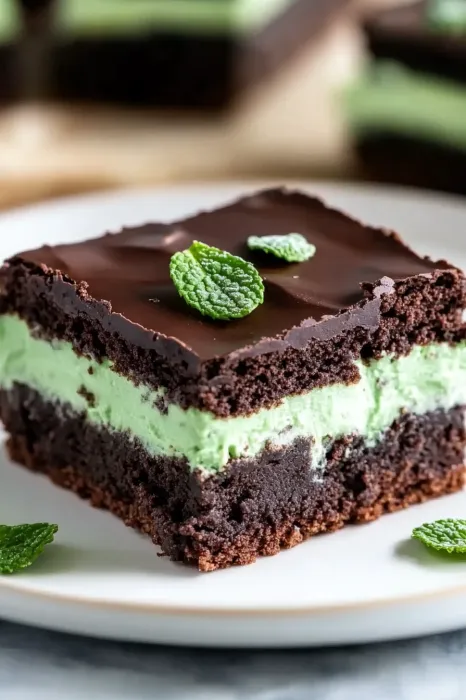
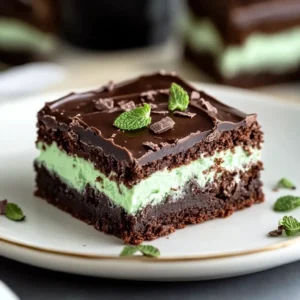
For special occasions, add a light dusting of cocoa powder or a fresh mint leaf garnish for visual impact.
Storage Solutions
Keep these layered brownies in an airtight container in the refrigerator where they maintain excellent quality for up to five days.
Allow refrigerated brownies to sit at room temperature for 10-15 minutes before serving for the best texture and flavor.
Freeze cut brownies by wrapping individually in plastic wrap, then storing in freezer bags for up to two months.
Thaw frozen brownies in the refrigerator overnight for best results, avoiding the microwave which can melt the layers.
For gifting, place individual brownies in paper cupcake liners inside a decorative tin for both protection and presentation.
Recipe Variations
Customize this basic recipe with simple adjustments that create entirely new flavor experiences.
Try orange extract instead of peppermint for a chocolate-orange variation that’s equally refreshing.
Add crushed candy canes to the mint layer during holiday season for festive color and texture.
Experiment with different chocolate varieties like dark or white chocolate for the ganache layer.
For coffee lovers, add a teaspoon of espresso powder to the brownie base to enhance the chocolate flavor.
Baking Tips
- Use a ruler as a guide when splitting the brownie layer to ensure even thickness throughout
- Freeze the brownie for 15 minutes before cutting into portions for the cleanest edges
- Warm your knife in hot water and wipe clean between cuts for professional-looking squares
My journey with these mint chocolate brownies began as an experiment but evolved into a signature dessert that friends and family now associate with my baking. There’s something deeply satisfying about creating a treat that combines nostalgia with unexpected delight.
What I treasure most about this recipe is how it brings people together around a shared experience. The visually striking layers invite conversation, while the familiar yet surprising flavor combination creates a moment of discovery with each bite. Even in our busy lives, these special desserts remind us to pause and appreciate the simple pleasure of something made with care.
The time invested in creating these layered brownies pays off not just in flavor but in the connections they help foster. Whether served at holiday gatherings, special celebrations, or simply as a way to elevate an ordinary day, these mint chocolate brownies have a way of creating sweet memories that last far longer than the dessert itself.
Related Recipe :
Mint Chocolate Brownies with Creamy Peppermint Filling
Ingredients
- For the Brownie Base
- Amount Unit Name Notes
- 1 cup Unsalted butter Divided
- 8 oz Semisweet chocolate Chopped
- 1 cup Granulated sugar
- 1/2 cup Brown sugar
- 4 Eggs
- 1 tsp Vanilla extract
- 1 cup All-purpose flour
- 1/4 tsp Salt
- For the Peppermint Filling
- Amount Unit Name Notes
- 1/2 cup Unsalted butter Softened
- 2 cups Powdered sugar
- 2 tbsp Heavy cream
- 1 tsp Peppermint extract
- to taste Green food coloring Optional
- For the Chocolate Ganache
- Amount Unit Name Notes
- 6 oz Semisweet chocolate Chopped
- 1/2 cup Heavy cream
- 1 tbsp Unsalted butter
Instructions
- Make the Brownie Base:
- Preheat oven to 350°F. Line a 9×13-inch pan with parchment paper.
- Melt 1/2 cup butter and 8 oz chocolate. Whisk in sugars, then eggs and vanilla. Fold in flour and salt.
- Bake for 25-30 minutes. Cool completely, then chill for 30 minutes.
- Prepare the Peppermint Filling:
- Beat 1/2 cup softened butter until fluffy. Gradually add powdered sugar, heavy cream, peppermint extract, and food coloring (if using).
- Assemble the Layers:
- Split the cooled brownie horizontally. Place the bottom layer back in the pan.
- Spread the mint filling evenly, then top with the second brownie layer.
- Make the Ganache:
- Heat 6 oz chocolate, 1/2 cup heavy cream, and 1 tbsp butter until melted and smooth. Pour over the top layer.
- Chill and Serve:
- Refrigerate until set (about 30 minutes). Cut into squares and enjoy!
Notes
-
Storage:
- Refrigerate in an airtight container for up to 5 days.
- Freeze for up to 2 months.
-
Variations:
- Use orange extract instead of peppermint for a chocolate-orange twist.
- Add crushed candy canes for a festive touch.
-
Pro Tips:
- Chill the brownie before splitting for clean layers.
- Warm your knife for clean cuts.
-
Common Mistakes:
- Overmixing the brownie batter can make it dense.
- Skipping the chilling step can make assembly messy.